

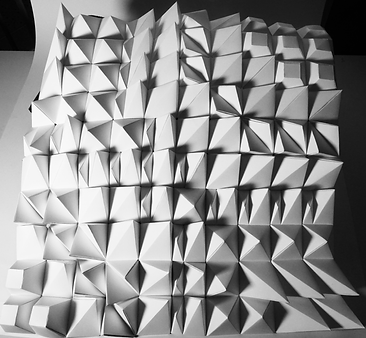
Final model made from ivory card
Module 3 PATTERN Vs surface
In this module, we aimed to make a surface using panelling tools in Rhino. We received our own terrains from Tasmania and create a surface by both Rhino and model making.
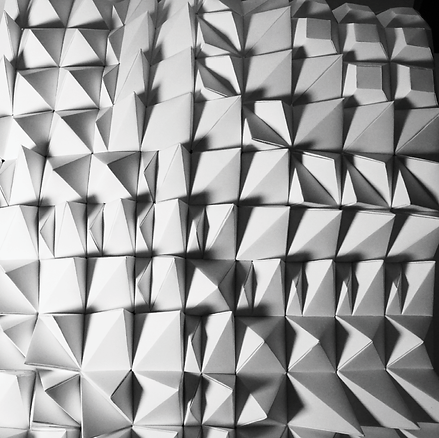
Plan view
Interior view
Idea
At first, I just tried several type of ptpanel3Dcustomvariable without any concept of design.
And then, since my terrain is a little bit slope and with one upper corner sunken, I thought of a corner of volcano. In order to show it, I plan my sunken corner to be a plateau, witch is the vocanic vent(that’s why I plan it to be more low than other panel), with a ridge surround it(the divided pyramid). Then, in the lower space, there are several rolling terrain that is caused by flowing lava of eruption.
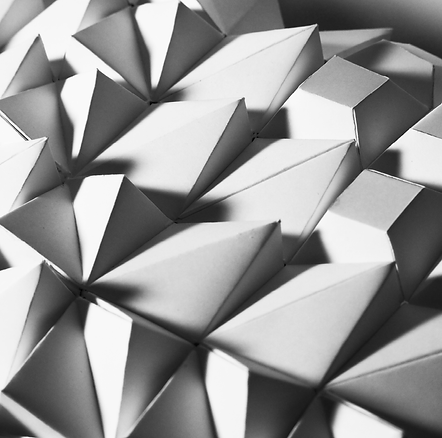
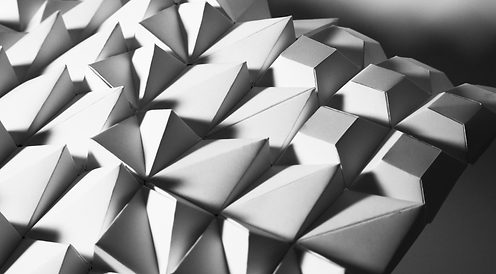
I have used more than 6 kinds of panels in this model, the panel shown below are the most typical type.


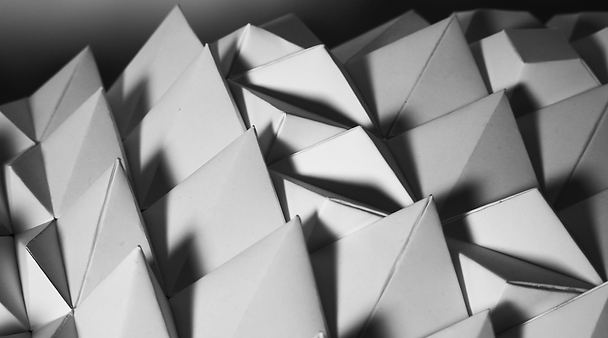
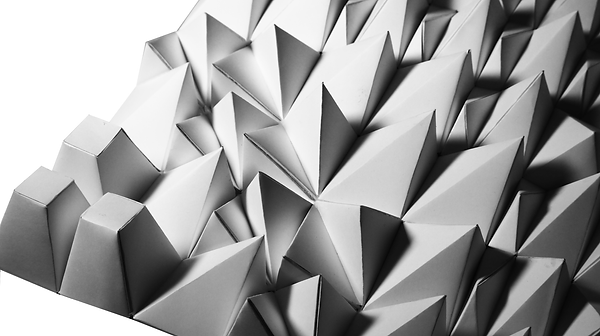
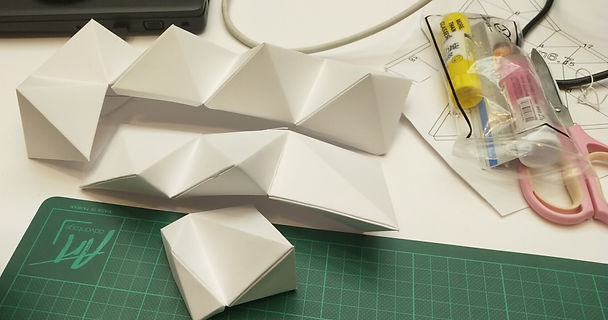
Rolling volcano mountain
Plateau surrounded by ridge


Process
To start my model, I tried several kinds of panel and grids, but I found almost every kinds of grids all look similar, so I just choosed a basic one with lower points on the top right corner to show the volcanic vent. When I tried apply panel on my terrain, the panels always crash with each other, Also it always rotate, which gives me some thing to work on with. In order to put the panel into the place I want, I planed and tried the oder of panel carefully.

every try in Rhino, it shows the tests I have been made

my panels
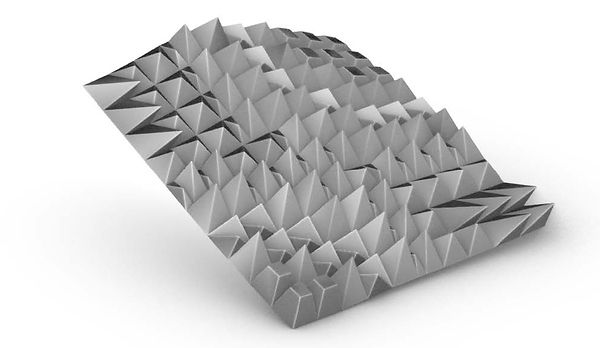
Final surface of my terrain.
Right one is top plan view.
Bottom one is isometric view, which looks like a volcano.


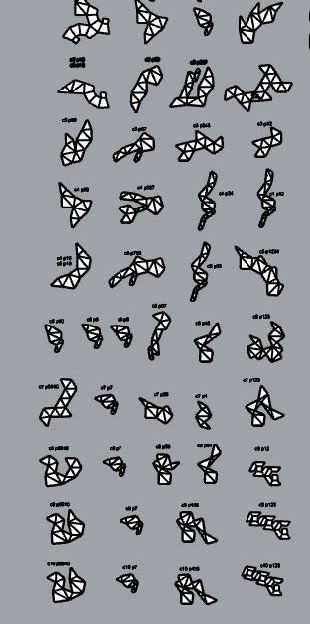
Then comes to unroll parts. As you can see, I unrolled it from column to
column(c1-c10), which is, in left image, one line is the unrolls for one column.
I did half unrolls first, then tried making model to make sure I did it right.

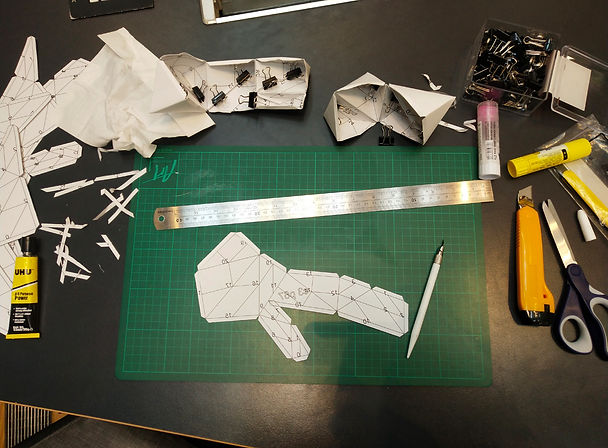
The process during midel making.
I tried several kinds of tools, like change from glue stick to craft glue to
UHU all purpose, use clip to make it stick more firm, and use knife pen to
cut the edge for easier fold.
However, I still faced some
troubes.
In left image, it shows I fold it in
the wrong way, since I’ve been
already used glue stick to stick
the whole paper on ivory cards,
I can’t fix it, so I have to discard
every previous unroll, which
wasted a lot of time and cards.
Then I reflected my illustrator
documents, thats why my code
on unroll is all mirrored.


In left image, the unroll surface can’t add tabs for unknown reason, so what I did is I drawed tab lines instead.
Then comes to the last stage, I glued it together then use clips to reinforce my model.


physical model rhino model
Reflection
For this module, we are required to create a surface using paneling tools in Rhino as well as model making and taking photos, which gives me a better understating of what architects do to create a design. During the process of making it, I gained knowledge of technical Rhino skills and model making skills, we should be very careful when doing it, better tried it before actually making it to avoid mistakes.
Also, I have a deeper understanding of design concept after doing it myself,how to use different ways to show the idea you are trying to tell, and the relationship between digital theoretical one and physical model, they can't been transformed completely. I also found some difficulties when design my terrain, I think it didn't show my concept exactly or clearly, also I did't found a good view to show my idea when taking photos,which make me realize that to materialize the virtual idea is more difficult than I think, that's what I should work on in the future.