
Module 2 FLATNESS vs PROJECTION
In this module, the subjective view of design will be shown by project 2 two-dimensional Mario image to Three-dimensional space.
Below is my two mario elevation images.

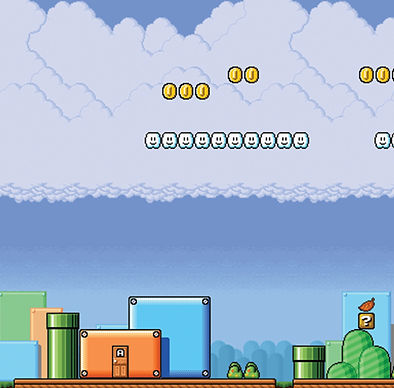
I choosed the first one to be the one in the front cause there is a box of bricks, but later I found that may be better to choose another one in the front, since bricks can also been seeing at the back, but the door in second elevation cannot been seeing.
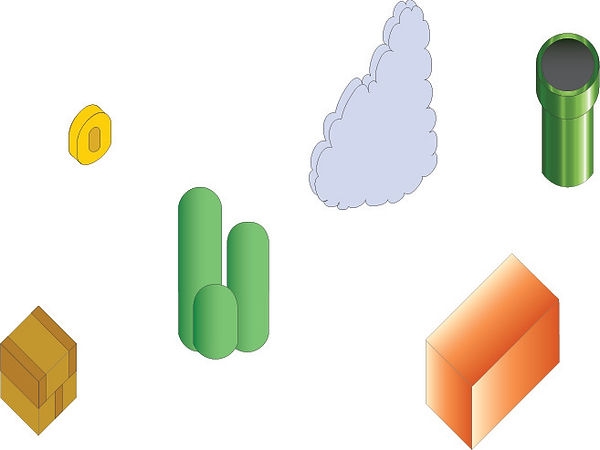
These are the six elements that I choosed for my mario world.
This module requires drawing skills and illustrator skills, the process of drawing my mario world is firstly using pencil to set up axonometric, then use pen to trace it, after that using illustrator to trace and fill in color. I will going to start with my hand drawing, witch is about setting up aexonomatric. In order to do this, I need to be very carefull and drawing object percisely. Firstly, I start it with planing, but that planning is not consistent with the idea of mario, in other words, off-topic. So I changed my planing and start with drawing cloud first, since the cloud is very time consuming and it is a part of elevation. What’s more, I need to think about the blocking place under cloud in order to prevent doing a lot of work and been blocked by it.

This picture shows 3 versions step of cloud drawing: first one setting up axonometric, second one drive it apart to show more layer, and the third one is add thickness to clouds

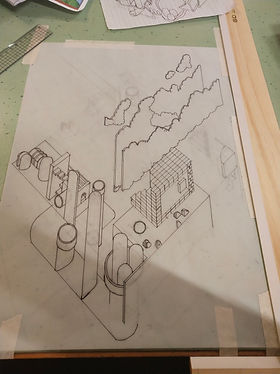

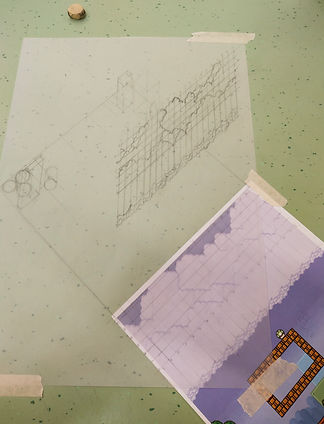
These three picture shows my hand drawing process step-by-step. The idea of my mario world is under world, the way we perceive it is not the whole truth, so I create some under space for mario to jump in through the pipe as well as stairs to go down and up. In addition, since these clouds are too high for A3 tracing paper, I actually finish my drawing in two paper, then combine it in photoshop after scaned it.
Then I moved to illustrator. I’ve been making mistakes all the time during the whole process in illustrator, so this is a very good exercise for me to get to know the way it works. My first big mistakes is i didn’t trace it in boxes, witch force me to draw it again. After a few hours of playing with it, I discovered it’s power, that is layer. I drew my object in sequence, so that I don’t need to draw irregular figures several times, what I did is simply be careful of the drawing sequence, if i did something wrong, just move it(also the things around it) to front or bottom to change the layer order. In this work, I made three different big layers: coin and teeth, cloud and line work. Then I start to fill in color. These two pictures shows my coloring process.
Also, in this process, I found some difficulties with the big pipe, the color looks wrong and the intersection between 2 pipes is also difficult to manage. I tried several times and ended up with fail.

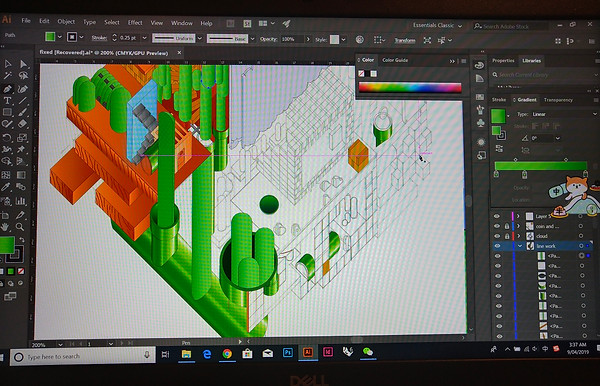
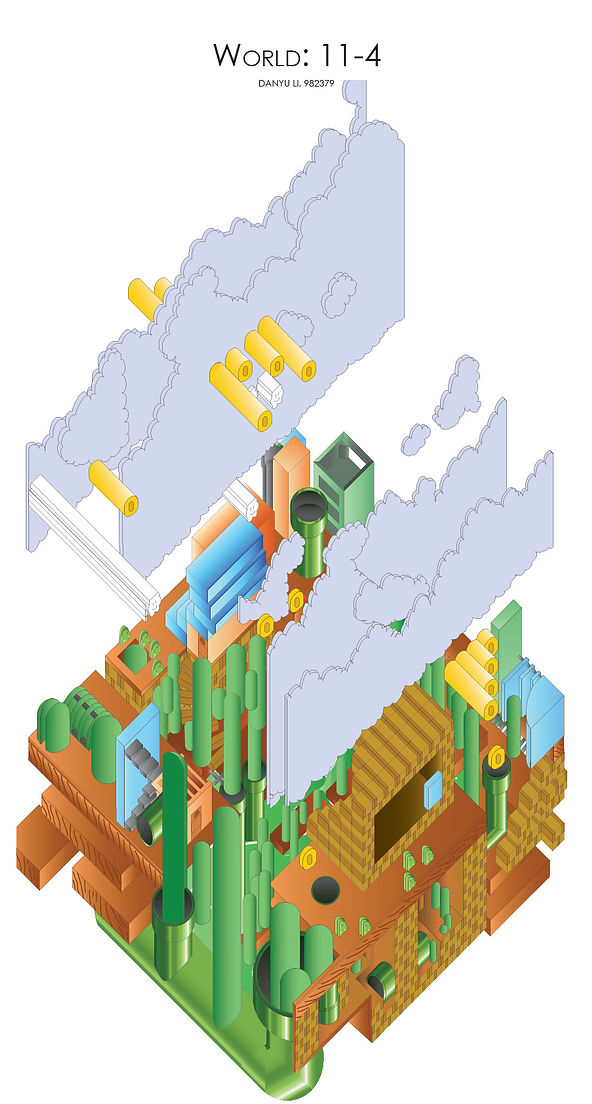
Finally, this is my work done.

reflection
After this project, I learnt about the projection, the relationship between 2D image and 3D world and how to transform then in order to show 3D design in 2D flat surface.
Also, it really helped me to improve my skills in hand drawing, axonometric drawing and illustrator, in design skills. On the other hand, I think what I highly need to change is my time management, because it caused a lot of problems. I start to draw it very late as others are more urgent, which led to lack of time for later job. And also, try to test it before final version would be great if it's possible, since it will give me a straight view of what it will be like in real situation as well as to know the process and some problems,and give me time to change and fix it.
That's the end of my module 2, thanks for your interest In my work.
Journal for M2